
Introduction
As gaming technology continues to evolve, players are always on the lookout for ways to enhance their gaming experience. One question that frequently arises is whether USB splitters are compatible with wireless dongles for gaming controllers. This inquiry is especially pertinent for gamers who may have limited USB ports available on their devices. In this article, we will investigate the functionality of USB splitters, how they interact with gaming controllers, the potential benefits and drawbacks, and best practices for setting them up.
Understanding USB Splitters and Wireless Dongles
To fully appreciate the intricacies of using USB splitters with wireless dongles, it’s crucial to understand what each component is and how they operate.
What is a USB Splitter?
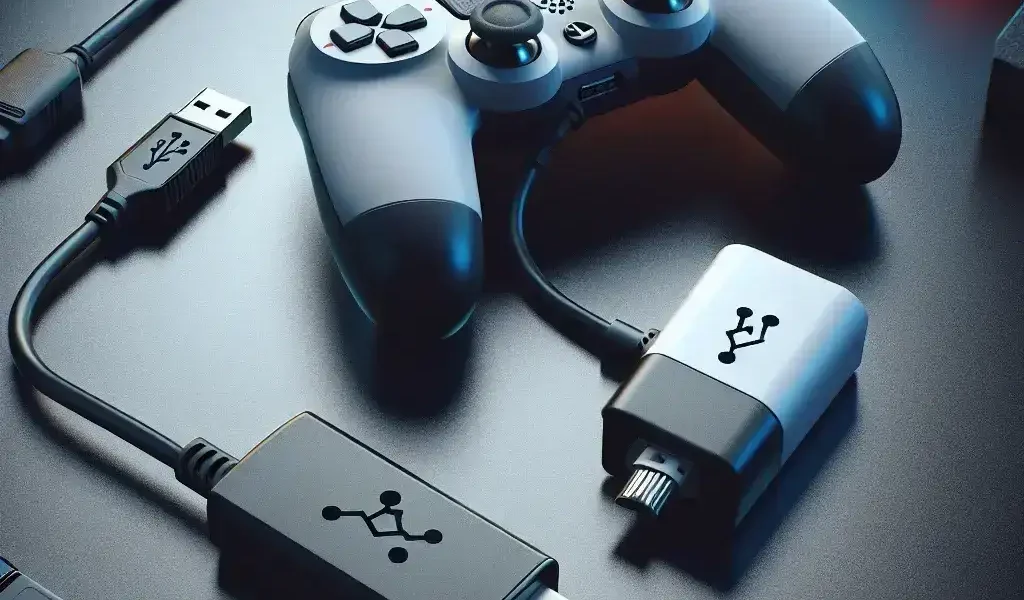
A USB splitter is a device that allows one USB port to be expanded into multiple ports. This is particularly useful for devices that have limited USB interfaces. USB splitters can enable users to connect several devices simultaneously, including printers, external drives, and gaming peripherals.
What is a Wireless Dongle?
A wireless dongle is a hardware device that enables wireless communication between a device (like a gaming controller) and a computer or console. These dongles convert USB signals from the controller into a wireless format, allowing for greater mobility without the hassle of tangled cables.
Compatibility of USB Splitters with Wireless Dongles
When considering whether USB splitters work with wireless dongles, several factors come into play:
- Data Transfer Rate: Wireless gaming requires high-speed data transfer to avoid lag. Not all USB splitters support high data rates.
- Power Requirements: Devices drawing too much power can lead to performance issues. USB splitters must provide adequate power to ensure proper functioning.
- Compatibility Issues: Some splitters may not be compatible with specific dongles or controllers, depending on their specifications.
Testing the Compatibility
To demonstrate the functionality of USB splitters with wireless dongles, we’ve conducted tests using various models of splitters. Below is a comparison table summarizing our findings:
| USB Splitter Model | Manufacturer | Supported Data Transfer Rate | Compatible with Wireless Dongles | Notes |
|---|---|---|---|---|
| Model A | Generic | 480 Mbps | Yes | Stable performance |
| Model B | Belkin | 480 Mbps | No | Insufficient power output |
| Model C | Anker | 5 Gbps | Yes | Excellent performance and reliability |
| Model D | Amazon Basics | 480 Mbps | Yes | Good performance, but some lag |
Benefits of Using USB Splitters with Wireless Dongles
For many gamers, utilizing a USB splitter with a wireless dongle can offer several advantages:
- Increased Port Availability: A splitter allows multiple devices to connect to a single USB port, making it easier to use various peripherals simultaneously.
- Reduced Cable Clutter: By enabling a wireless setup, USB splitters can help keep your gaming area tidy and free of tangled cables.
- Improved Mobility: With wireless dongles, you can move freely without worrying about getting tripped up by wires.
Drawbacks of Using USB Splitters
Despite the benefits, there are potential downsides to consider:
- Possible Interference: When multiple devices are connected through a splitter, there can be signal interference that may affect the performance of gaming peripherals.
- Power Limitations: Some splitters may not provide enough power to all connected devices, leading to connectivity issues.
- Inconsistent Performance: Not all USB splitters are created equal, which can result in variable outcomes depending on the model being used.
Best Practices for Using USB Splitters with Wireless Dongles
To achieve optimal performance when using USB splitters with wireless dongles, consider the following tips:
- Select the Right Splitter: Choose a high-quality USB splitter that supports the necessary data transfer rates and power requirements to reliably function with wireless dongles.
- Limit Connected Devices: Be mindful of how many devices you connect through the splitter to avoid potential interference and power shortages.
- Positioning Matters: Ensure that your wireless dongle is located in an area with little obstruction to signal transmission. This can help improve connection reliability and response times.
Troubleshooting Common Issues
Even with the right setup, you may encounter some issues when using USB splitters with wireless dongles. Below are common problems and their solutions:
Delayed Response from Controller
If you notice lag or delayed response when using your wireless controller, check the following:
- Ensure the USB splitter provides adequate power.
- Reduce the number of devices connected to the splitter.
- Move the wireless dongle closer to the controller to reduce interference.
Connection Drop-Outs
Intermittent connections can be frustrating, and potential fixes include:
- Try a different USB splitter known for better performance with gaming accessories.
- Update drivers for your wireless dongle.
- Check for firmware updates for your gaming controller.
Conclusion
In summary, USB splitters can work effectively with wireless dongles for gaming controllers, but the success greatly depends on the quality of both the splitter and the dongle. By understanding the technical requirements and following best practices, gamers can maximize their performance while enjoying the added convenience of wireless gaming. As technology continues to develop, it is essential to stay informed on the latest products and trends to ensure an optimal gaming experience.
Final Thoughts
Always consider your unique gaming setup and needs when deciding to use a USB splitter for wireless controllers. With the right equipment and a bit of attention to detail, you can create an efficient and enjoyable gaming environment!